Under Advanced/Custom reports, you can find three other hours summaries which are different from the standard type. These are created as crosstabs in the Report Designer. They are not simple to customize, but are exceptionally powerful.
When to use this report
What groups gave you hours, broken down by month?
Steps in this task
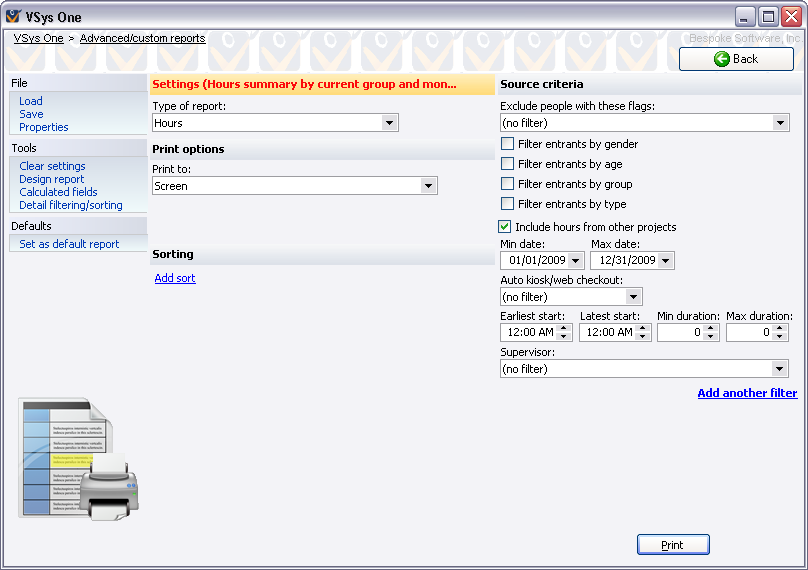
Click on the Advanced/Custom link from the Reports panel.
Select a saved or built-in report to use. There are three built-in reports in this class: Hours by Current Group and Month,Hours by Group and Month, and Hours volunteer crosstab by month. (When VSys stores a volunteer hours record, it remembers the group the volunteer was in at that time, and reports the hours here as being credited to that group. "Current Group" is the group each volunteer is in now, "Group" is the group they were in when their hours were credited.)
Set any filters on the volunteers or their hours.
Click Print to run the report.
Sample - Current Group and Month
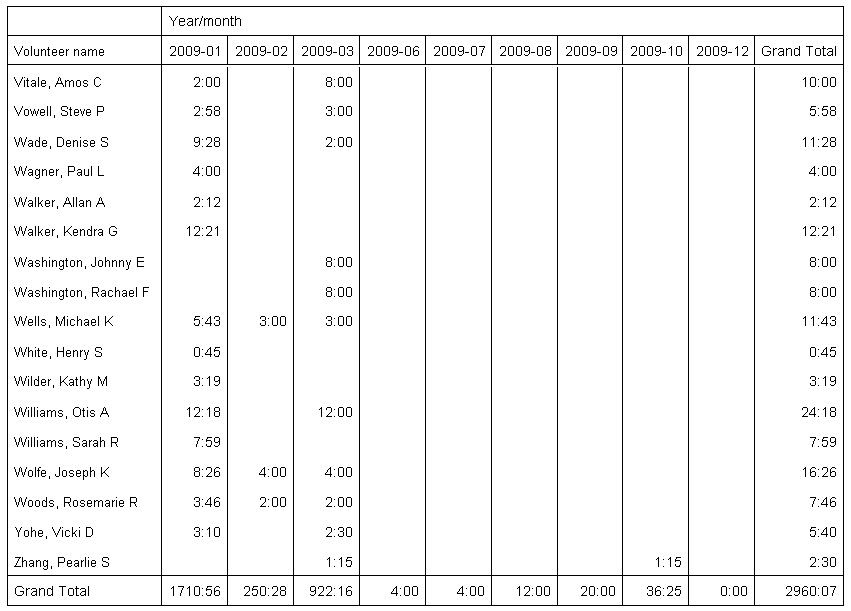
Sample - Volunteer and Month
Creating your own
Using the Report Designer, you can create or modify your own hours summary grids reports.
Select a starting report. Load one of the built-in "Hours summary" variants.
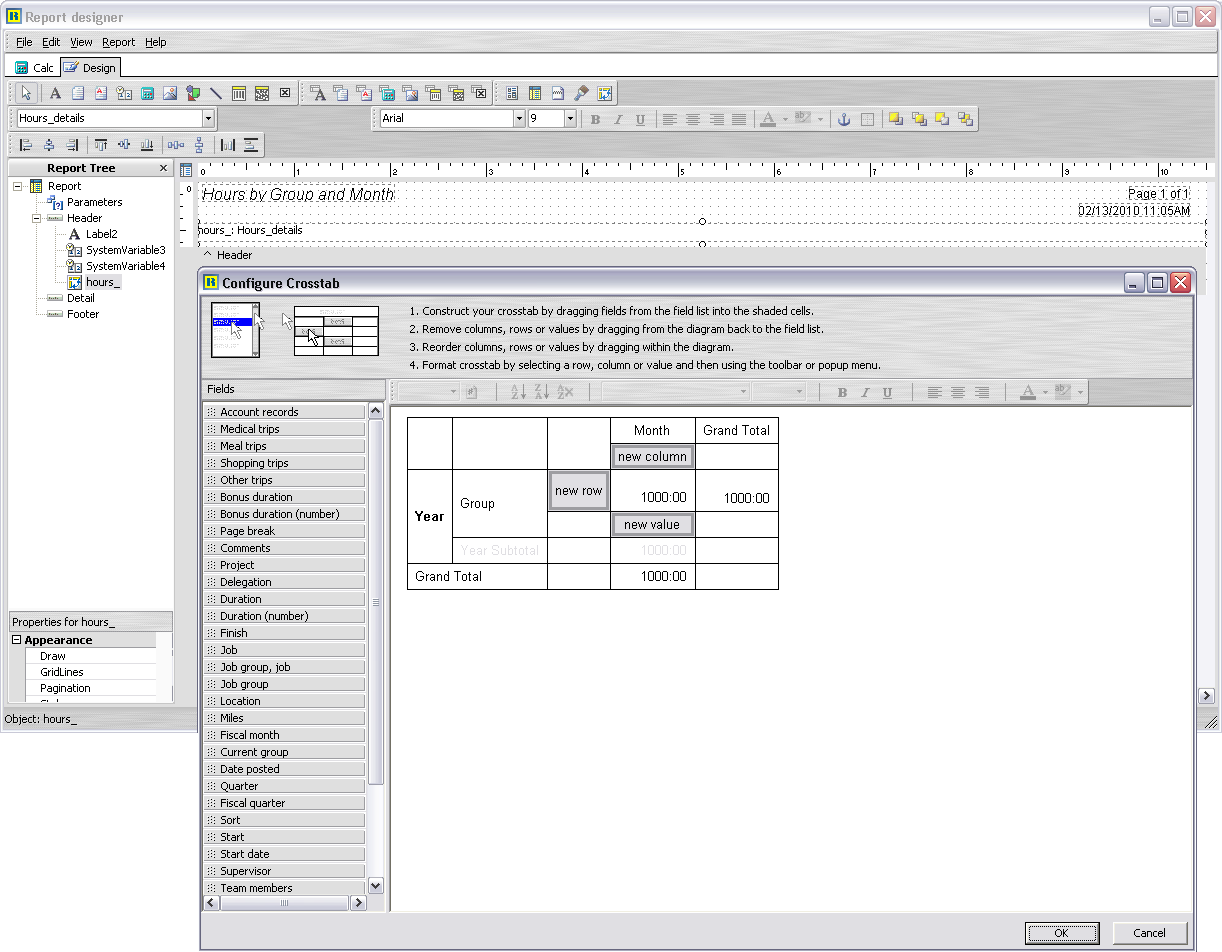
Click on Design report in the left margin
Select the "hours_: Hours_details" crosstab pane in the middle section of the screen, then right-click and select Configure.
For any of the fields on the left, "Bonus duration", "Miles", etc., drag the field to the new row, new column or new value texts. The first two of these will organize your results by those values, the last will total these values for each combination of column and row.
Click and drag away any row, column or value fields which you don't want to use.
Click on any totaled value to choose the method used, for example "Sum", "Count", etc. You can also set the font name, size and formatting for any of the values.
Click OK to close the Configure Crosstab window, then on File and Close to close the Report designer.
Click Save from the reports screen if you want to keep this modified report.
Experiment. It will take a few attempts to get the results you're looking for. Remember that for reports like this the Type of report must be "Hours" and that you should only have one crosstab, and no other data elements, placed on the report.